Monday, April 29, 2013

Some pretty flowers


Bright colors will be a great contrast to the white walls and trim.  Here's one daffadil from our garden surrounded by some pretty purples (I don't know what they are as they were imported from somewhere).

Also started painting the jambs.  We're working on some thoughts for the framing - thinking of a shelf that will go above the windows and slider for display.

Sunday, April 28, 2013

starting the window trim


Finished extending the window jambs.  We're going to do things a little differently than normal.  The trim will sit on and beside the jambs rather than over them.  Next up will be to do the same with the sliding door then add the trim all around.
This corner will be a tight fit
Here's what the trim will look like above the windows
Here's how the top and side trim should line up

Saturday, April 27, 2013

the wall is done


The wall is done and painted with a couple of coats of flat white.  Now we'll be able to return to completing the baseboard, window trim and step.

Meanwhile, over the last year an ant colony had formed under the patio.  Their activity resulted in several bricks dropping a half inch or so.  We treated it today and the activity has subsided (meaning, the ants are dead!)  We'll add some stone dust and reset the bricks so there will be a level surface once again.

slight change of plans

After living with the walls and trim for a couple of weeks, I've decided that a big bookcase would dominate the wall and detract from the rich tone of the shelf.  So back to the tape and joint compound to seal up the remaining gaps, a little sanding, and some more paint and it will be ready.  Right now we're thinking of some floating shelves so stay tuned.

Monday, April 15, 2013

first coat of polyurethane


After a thorough sanding and a wipe down with naphtha, the first coat of poly has been applied.  I intended to use a water-based product but having second thoughts went with an oil-based polyurethane that should give the desired results (but it will take several days).
the black filler putty sanded down well

need to start building the bookcase

view from the dining room is getting better
It's been a while since I've cleared out all the tools and taken up the drop cloths.  Sunny day in the 50's makes it feel like spring is here.

finishing up the window sills


Well, took some time this morning to finish up with the conversion from floor boards to window sills.  Nice and sunny for a change so I could set up outside to minimize the dust.  After some very careful cutting (there are no extra pieces so it has to be right the first time) everythings in place.
complex cuts to fit

a little more trimming and it's good

now to join the corner together
Those dark spots are the wood filler for the nail holes.  Those will get final sanding later and they should disappear to some degree.
this was the easy one
All that's left is more sanding and then the application of many coats of poly.  After that the window trim needs to be completed and the baseboard installed and this project will be ready for some enjoyment.

Sunday, April 14, 2013

finally, chair rail


Not sure a martini glass will fit
Started installing the chair rail today.  Goal was to be able to hold a wine glass on the narrow sections - accomplished!  We will coat it with many layers of polyurethane to give a rich tone (and to resist the inevitable spills).  Tomorrow we'll tackle the window sections.

this side is almost done
door is done with 3 coats and rehung
may keep the windows natural to match?

Saturday, April 13, 2013

A leak!


Sometimes you wake up after a long night of steady rain and find something you don't want to see.  This morning it was puddle by the big sliding door.  At first I thought it was just some rain that got in when I openned it, but on further review, there was a drip coming from just above the door itself.  I've caulked the exterior - more rain on tap tonight so we'll see if that is the culprit.  Long term, we're planning on a gutter and rain collection system which should help.
the exit point for the water
best guess is that the water crept down the fascia throught this crack (since sealed) and below the door's header to the path of least resistance 
Meanwhile, painting continues with the door and it's trim.  Hopefully tomorrow will allow for the chair rail to begin to be installed.

Monday, April 8, 2013

more paint and more trim

Stayed home from work to get one more task completed.  After trimming the windows it was time to trim around the door.  This step was needed in order to then start adding the chair rail.  As with the window trim, the door trim needed to be built out to match the uneveness of the walls, wainscotting and existing rough trim.  
door opening before trim


building up the trim

in place


There's now a coat of paint on the door trim and three coats on the windows.
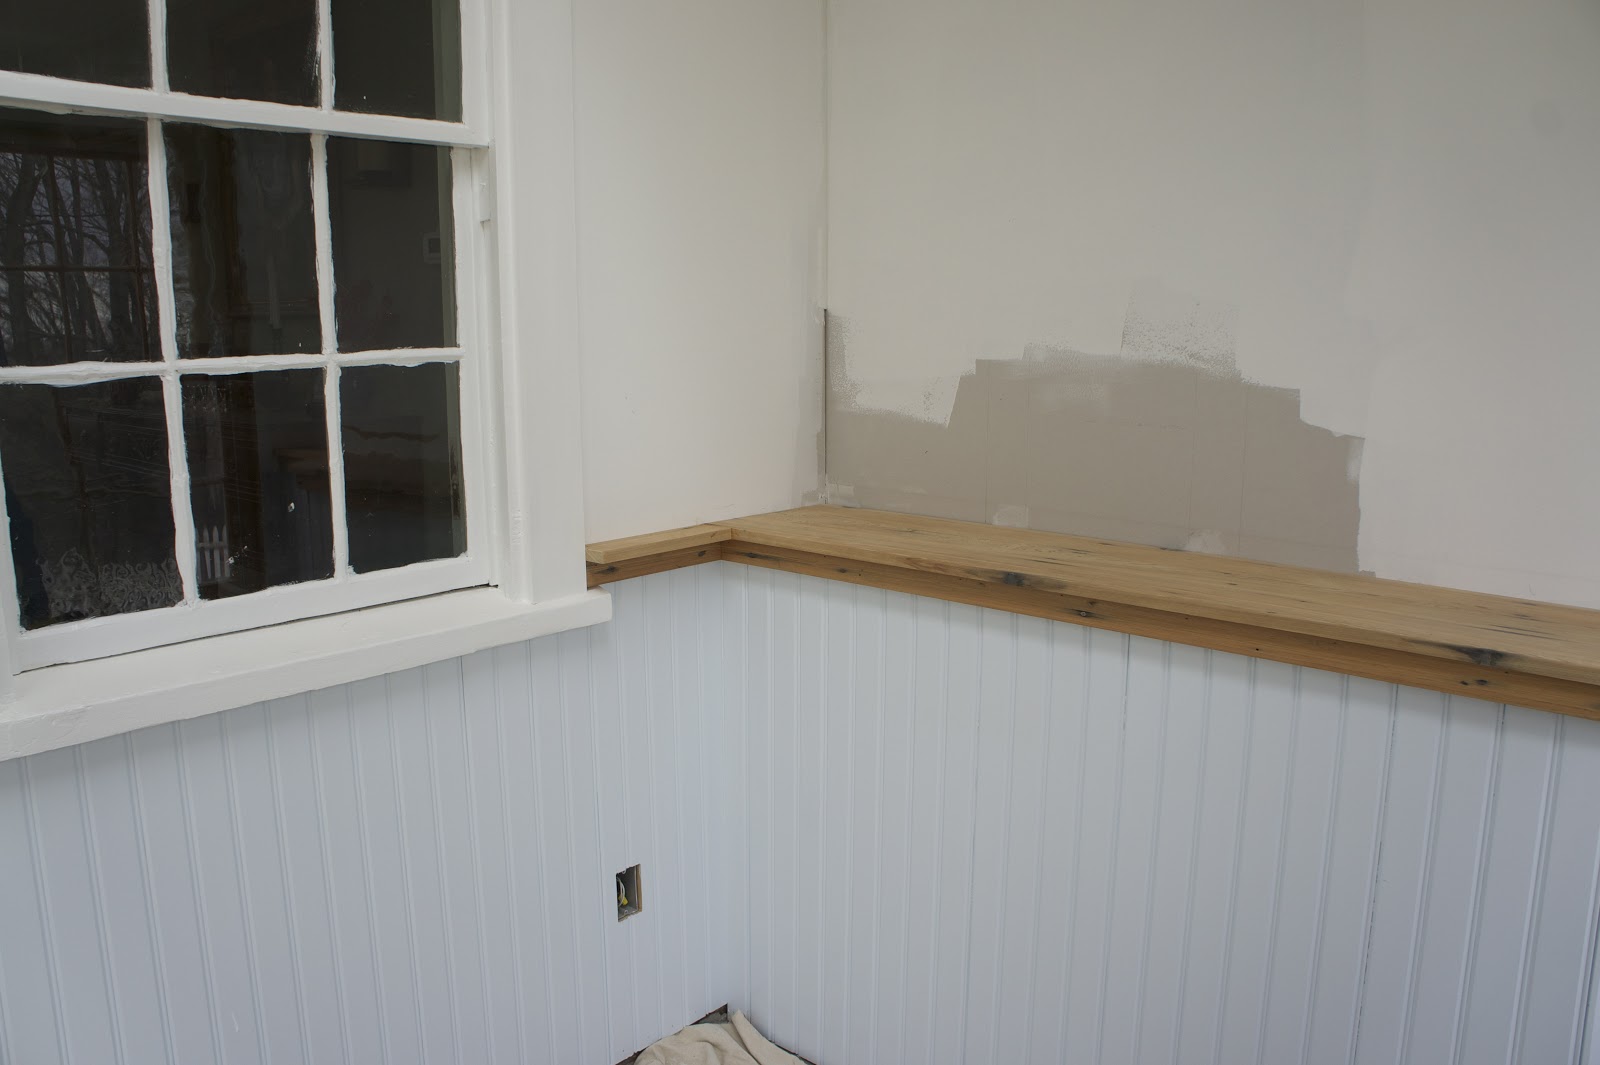
Here's a sneak peak at the lumber that will be used for the chair rail.  We salvaged the original porch floor boards - look way back in the blog and you may find them coming up.  They were in rough shape - many nails from the original square nails to modern nails and staples.  There were about 4 layers of flooring when we started ripping things up.  Below is a before and after.  The board on top has been planed and the edges squared.  The holes have been filled with epoxy to keep the character and remind us of the history.  Next weekend we'll be cutting them to fit and start the installation.
original porch floor boards

Sunday, April 7, 2013

Window trim

We fabricated some trim to finish the old windows.  Because the wall board is not flush with the old trim, we had to build up the outsides as seen in the picture below.

built up trim

before adding trim

finished windows

Now they just need paint and they will be done.  Next up will be the chair rail.